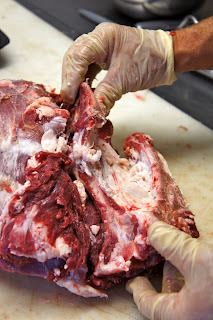
The first cut is made in between the fifth and sixth rib, counting from the neck. Use your knife to cut along the rib cage.
Then get out the meat saw and cut through the spine and lower chest area.
When finished, you have separated the chest from the loin area.
Now find the "small" of the back or the end of the loin. My finger and thumb are showing the exact spot.
You will need to use your meat saw to cut through the spine.
You now have separated the leg from the loin and rib area.
Here are the three primal cuts of meat on a sheep. The shoulder, rib/loin and leg.
The knife is pointing to the area just below the ribs and loin. This thin flap of flesh should be cut off and used for ground lamb.
This is what the piece looks like after it is removed.
Next make a straight cut through the ribs, keeping the saw blade parallel to the loin and spine.
You will end up with a small section of ribs. You should trim off the outer layer of meat off this rib area and put it into your ground lamb.
Here is the trimmed bottom portion of ribs. These can be wrapped as is.
Now remove the outer flap of flesh that covers the lamb chops. Make sure you do not cut into the chop itself.
To improve the overall appearance of lamb chops, you can "french" them by running you knife blade up and down each rib bone.
Here is a "Frenched" lamb chop roast with the loin chop roast still attached.
I have separated the loin roast and am cutting the loin roast into loin chops.
Moving back to the leg of lamb, I cut off the back shank of the leg.
The pelvic bone of the leg of lamb is a challenging bone to remove. I have included a sequence of pictures showing the shape and position of this bone, which covers the sirloin of the lamb.
Here is the pelvic bone removed with the sirloin just underneath it. Notice the "ball and socket" joint on the leg of lamb and pelvic bone.
Another picture of the pelvic bone with sirloin.
Pelvic bone removed with my finger pointing to ball joint.
Bring back the meat saw and cut along side the ball joint, removing the sirloin.


The last of the primal cuts, the shoulder. Here I am removing the front shank.
Liked this picture(no other reason)
Removing the front shank.
The shank has been removed and I am showing the way it looked while attached to the front shoulder area.
Another interesting picture.
De boning the shoulder. I have just removed the scapula.
Here is the finished shoulder de boned. The job of taking out the bone structure from the front shoulders is a tricky job. I recommend spending some time with a butcher to understand how the bones within the shoulder lie with the primal cut.


